
Have you started working on your Christmas cards already? if you are still trying to get ideas or have not decided yet on what to do this year, then you are going to be in for a treat! As today we are going to share with you Christmas cards to help you get ready for the holidays!!
So hop with us and visit all participating blogs! I am sure you’ll get lots of ideas and inspiration to get you going!
Let’s get started!
Christmas Card
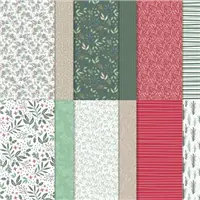
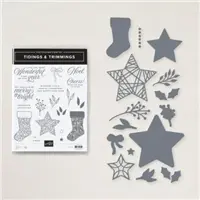
Since we are featuring Christmas projects for this blog hop, I decided to showcase the Tidings of Christmas Suite from the Annual Catalog. This suite has an elegant designer series paper (DSP) and a super cute bundle called Tidings & Trimmings.
The die set in this bundle has a great set of stars that can get die cut and use as a standalone piece or as the focal point in your cards! And this is exactly how I used it on my card today as you can see below.

Color Combination
As usual, I followed the DSP to pick a color combo. This has been by far one of the easiest ways to get color combinations for your cards.
So if you ever struggle with color ideas give this a try! Pick a DSP pack and then pay with the colors included in the pack!
By the way, if you have not heard yet, there is an awesome promotion during July where selected pattern papers are at 15% discount! And the Tidings of Christmas DSP is part of that promotion, so if you have thinking about this paper pack, this month is perfect to add it to your collection!
Think about it, if you get the Tidings of Christmas DSP, you could start making your Christmas cards right away! 😉 Ready to get your favorites DSP? then go to my store and put them in your cart.
Other packs included in this promotion are listed below:
- You’re a Peach, Sweet Symmetry, Hand-Penned,
- Tiding of Christmas, In Good Taste, Pansy Petals
- Beauty of the Earth, Bloom where You’re Planted, In the Wild
Christmas Card Details & Other Information
Below you can see the inside of this card, as you can see this is an easy fancy fold.
For this fancy fold you just need to fold the card base in half and then the front in half again and you are done! super easy right?

Also as you can see for the inside of this card I stamped the star and the sentiment. The star is with the Soft Sea Foam, mainly because I wanted a light color under the sentiment. And the sentiment is in Early Expresso.
For the sentiment in the front I used Evening Green and then punched it with the dual oval.
One thing to note is that the detail star in the front can be glue down two ways:
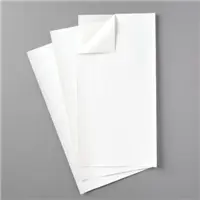
- Add adhesive sheets to the back of the Cherry Cobbler Cardstock and then die cut – this will create a sticker so it is easy to glue it to the green star.
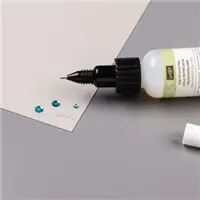
- Or you can due cut the Cherry Cobbler star and then add it using the fine tip glue pen, which is what I did on this one
Both ways will work perfectly, so just pick the one that is easiest for you!
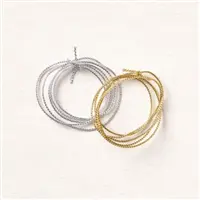
Also beneath the green star I added the elegant trim to pop a bit of gold in the card.
Below you will find the full supply list for you to see all the materials I used. As always you can click on the images to get to my online store where you can purchase any of the products I used.
Want additional help to get ready with your Christmas Cards this year?
If you want to get additional help to get ready with your Christmas cards without the stress and in time for the holidays then make sure you watch the following video where I explain in detail everything about the 2021 Christmas Card Classes series to help you make 60 Christmas cards between now and the holidays.
Let me do the hard work of designing and prepping all the cards for you.. while you just take a day or two a month to enjoy some crafting time as you put together your cards.
If you have any questions let me know. I am here to help you in any way I can. 😊

As usual if you live outside the United States, you can still get the class by getting the tutorial only option of this class.
You can find all the tutorials I currently offer on the tutorial store which you can find on the top menu of this blog or here
If you are interested in the Tutorial for the Tidings of Christmas card class you can click here.
To register for the make and take option, then make sure you’re in my email list, as this is where I will be emailing all the registration links for the Christmas Card Classes series as well as any other card class I offer. If you want to join my list, please provide your email here.
Blog Hop Line-up!
As mentioned, today’s post is part of an amazing blog hop, so make sure you visit all participating blogs to get more inspiration for your next Christmas project!
The Supply List
You can see below the full list of Items I used to make these cards, if you click on the images below it will take you to my online store where you can purchase any of these items. I truly appreciate your continuous support 🥰
Sale: $9.78
Price: $11.50
Want to remember this post for later? Save this Christmas Card Idea in your favorite board!










Great card! and your Stamp A Stack looks amazing
Wonderful card design and I love the fun fold. The DSP is just gorgeous too. Thanks for sharing
Beautiful holiday card!!! How do you operate your classes? Do you send products in a “kit” each month or just the downloadable PDF? IThanks!!
Lovely card x
Very nice fun fold!! Thanks for sharing
What a great card!
Very nice!
love how you stamped the inside with the image and the greeting.
Love everything about your card!
I can not hear and I am deaf. I watch video Do you have PDF and what measure size cardstock??
Beautiful card, really rich and Christmassy x